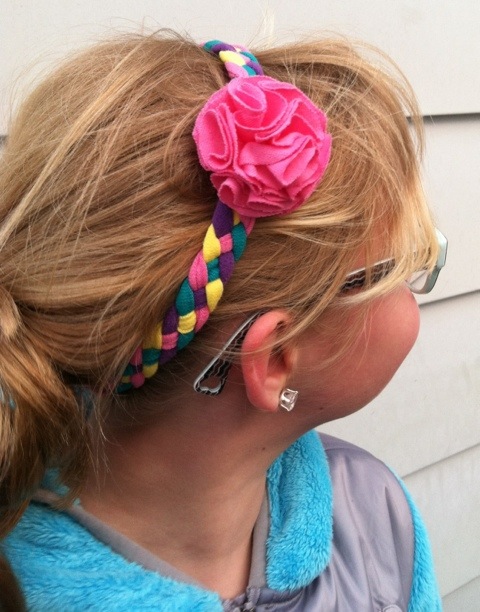
There is something so satisfying about small projects and these T-shirt flowers are quick and easy and oh so satisfying!
These flowers were made from the leftover t-shirt tops from my crocheted rugs so I have the added satisfaction of free materials and saving something from the landfill. I used 2 basic flower making techniques with some variations.

The circle flower:
From fabric cut out 10 – 14 circles, mine were 2 inch diameter circles. I cut a circle from cardboard and then traced as many circle as I could fit avoiding the screen printed design on the shirt top. I use a fabric marking pen to trace, these pens come in 2 styles one that fades out and disappears in a day or so and another that disappears when it gets wet, they are great for sewing or any fabric crafting.

You can cut the circles out with pinking shears (zigzag scissors), or you can add some scallops, or just leave the circles plain.


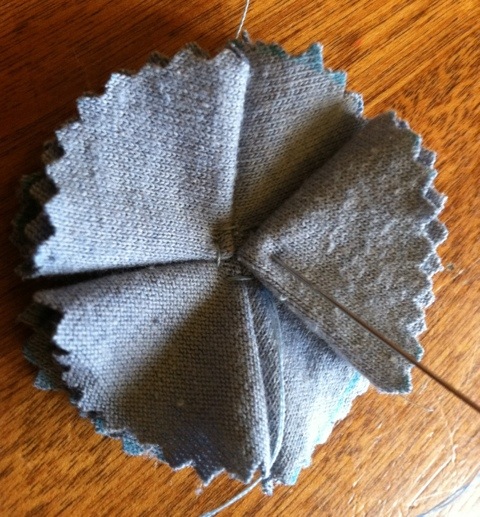
Use one circle as the base then fold the other circles into quarters. Place 4 of the quarters onto the base and either glue or sew them to the base. I personally like to sew my flowers because I’m a sewer and so it is easy and then I don’t end up with glue all over my fingers. You can use tacky glue or a glue gun, I don’t use a glue gun on these because I lack the patience to wait for it to cool and then I end up burning my fingers!

Add another layer of quarters but this time overlap the the seams on the layer before.
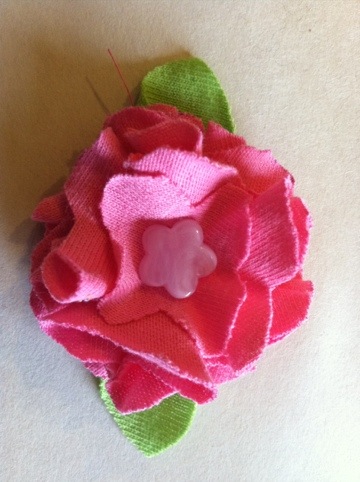
Now you could add another layer for a fuller flower or add a center. One version for the center is to fold a circle in half then roll it so it resembles a rose bud then stitch and/or glue into the center of the flower.
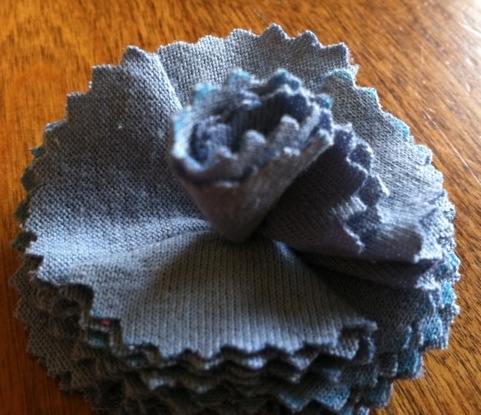

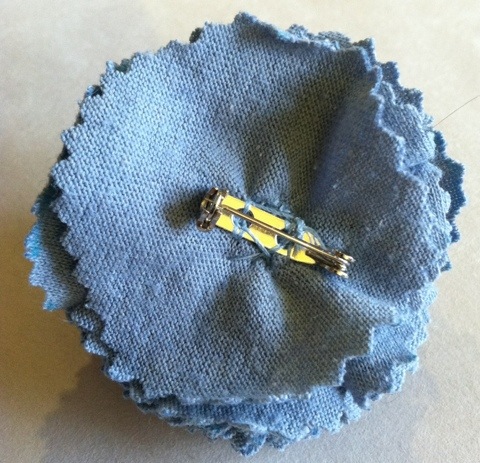
Another version is to cut a smaller circle and sew and/or glue it to the center flat, then add an embellishment like a bead, button or rhinestone to the center.
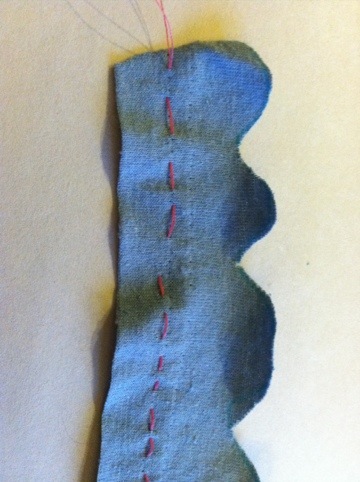
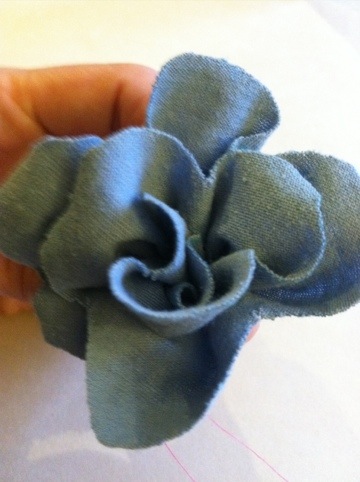
Gathered version:
Cut a strip of t-shirt with a scalloped top – mine is cut from a sleeve just above the hem, it was 14 inches long and 2 1/2 inches tall I made my scallops bigger at one end and then gradually smaller to the other end.

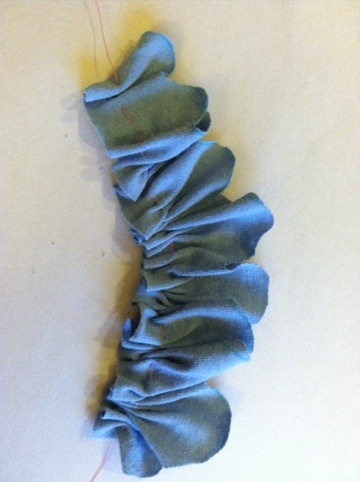
Gather by stitching a running stitch about 1/4 inch from the bottom edge, then scrunch the fabric up along the thread.
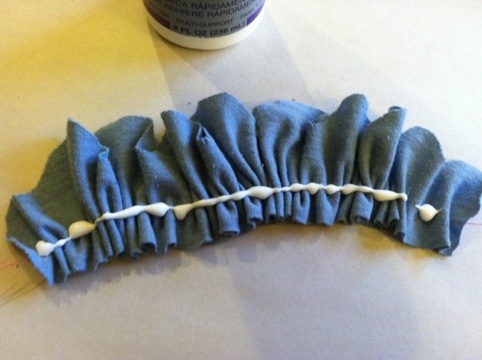
Add some glue over the gather and roll into a flower shape starting with the smaller end.
Finishing:
I added some leaves using a strip of green t-shirt with a point on each end glued to the back of the flower.

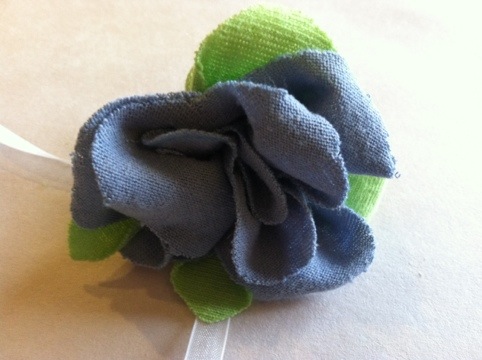
You can use these flowers for all sorts of things – because I have a daughter most of mine end up on headbands. But I also have made some cute brooches by sewing or gluing a pin to the back.