I really love crafts that don’t cost a lot of money! Last summer my Aunt was working on a rug made from old t-shirts the rug that she was making was going to be room sized and it was already over 5 feet long – and the best part was all the shirts had been given to her by people happy to get rid of old shirts! I loved the idea so much that I knew I had to make a t-shirt rug of my own.
Last year I lost 40 pounds and so I had a pile of plus sized clothes to donate which is a really great feeling. I kept the t-shirts for my rug but many of them had side seams which really don’t work well. It takes quite a few shirts to make a rug so I needed more shirts. Lucky for me I found that once I told people what I was doing they were happy to contribute to the cause! My Aunt goes to Church Bazaars where they will have bag sales – everything you can fit into a bag for a dollar – she fills her bag with t-shirts. Unfortunately I haven’t found any Church Bazaars in my area but I am keeping a lookout!
What to look for in t-shirts for yarn:
- no side seams
- the bigger the better – size Large and higher will give you the most yarn
- designs are fine but as little as possible – best if the design is high on the shirt or just lettering
- a few stains and small holes are OK
- colors that you like
- try to get them all the same weight/thickness or as close as possible
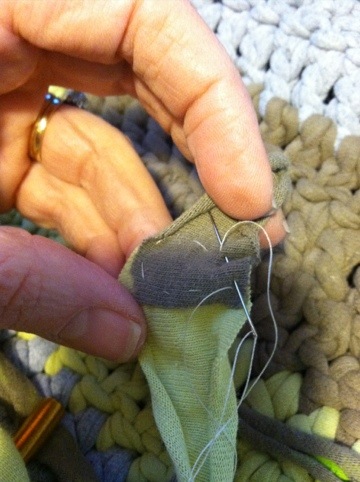
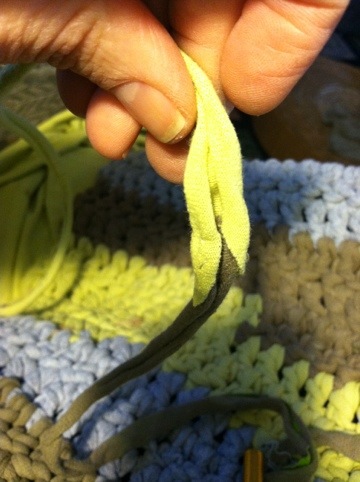
To cut the t shirts I followed these directions except I cut my strips about 3/4 inch wide. I found that when I joined one piece of yarn to the next it made a smoother transition if I stitched the ends together rather than knotting or looping them together. It only takes a moment to hand stitch them together and it looks good .
I’m a knitter but I had never crocheted before this so I watched a couple of videos online and then jumped in. I decided to make an oval rug because it seemed the simplest. I used a size N hook and made a chain I had no idea how big to make it so I just guessed at 30. I single crocheted into each chain until I got to the end then I crocheted 3 single crotchets into the last chain. I kept going around the corner to the other side and single crocheted into each of the original chains. I kept going around and around but with each round I added 3 single crochets at each end (single crochet twice into the same stitch.) I tried to add my stitches in the same place which ended up looking almost scalloped. I ended up using about 20 shirts for a rug 4 1/2 feet x 2 1/2 feet wide. For my first attempt I used white, grey, black and blue shirts. Unfortunately the white gets dirty fast and washing it with all those dark colors just makes it look dingy. And by the way since the rugs are made of t-shirts they are completely washable!
It wasn’t a total fail but I left lots of room for improvement!

My second attempt was for my daughter’s room so I wanted bright colors. I started her rug with a tie dyed shirt and I loved the look – I later realized that the tie dyed shirt was a much lighter weight fabric than the other shirts and so the rug doesn’t lay as nice as I would like. I did much better by staggering my increases so I ended up with a nicely shaped oval. I started her rug with a chain of 9 it ended up 3 feet x 2 1/2 feet with 15 or 16 shirts.
I’m getting better and luckily I have more t-shirts for another attempt!


